Kombucha is a popular beverage that’s made by fermenting sweet tea with a culture of yeast and bacteria. It’s an ancient drink that, until fairly recently, had only been shared through grassroots channels. Now it’s a booming market projected to be worth $7.05 billion by 2027. That’s a lot of kombucha.
In my opinion, there’s no match for the wonderfully refreshing, tart flavor of a fizzy glass of kombucha. But it’s not just the taste that’s driving its growth in popularity. It’s also the healthy dose of probiotic bacteria you get with every bottle.
If you’ve read anything about nutrition in the past decade, you know that a healthy gut microbiome is essential to our overall health and well-being. We now know that the good bacteria in our gut can help support immune function and mental health, and potentially even protect us from developing allergies, autoimmune disorders, infections, and certain types of cancer.
We also know that some forms of probiotics appear to be more effective than others, with the most beneficial types coming from living, fermented foods like yogurt, sauerkraut, and kombucha.
I’m especially fond of getting my good gut bacteria from kombucha. But kombucha can quickly become expensive if you’re satisfying it solely through store-bought products. I like to drink a bottle every evening, and the best price I usually find on GT’s is $2.50 per bottle (on sale). That’s $75 per month! By making my own kombucha, I can get that cost down to around $0.10 to $0.50 per bottle, depending on flavorings.
So if you want to save some dough and up the probiotic game of the kombucha you’re drinking, you should consider making it yourself.
It may seem a little intimidating at first, but once you get the hang of making your own kombucha, I promise you’ll never want to stop. And with this simple, easy-to-follow homemade kombucha recipe, you won’t have to!
Is Homemade Kombucha Safe to Drink?
The first question many people have about homemade kombucha: is it safe to drink?
With fermentation, there’s always some possibility of mold contamination when brewing at home in an uncontrolled environment. After all, you’re creating a warm, moist environment where bacteria can thrive.
Mold can make you sick, so clearly you want to avoid that. Luckily, it’s pretty obvious when you’ve got a mold issue, and you can easily reduce the odds of this happening by making sure your tools, work area, and hands are clean anytime you mess with your ‘buch.
And even if you do happen to get some unintended contamination, it’s usually pretty noticeable. Especially once you get familiar with the look of a normal, healthy SCOBY.
I’ll go over some common issues and what to look for to determine the health of your brew later in the troubleshooting section of this guide. If you want to get a variety of other opinions, I recommend joining a Facebook group, such as Kombucha Nation or Kombucha Home Brewers Worldwide, or the Kombucha sub on Reddit, where you can post your own photos.
What Do I Need to Make My Own Kombucha?
Before you can get started making homemade kombucha, you’ll need some very basic equipment and ingredients. Most of it can be purchased through Amazon or at your local container store. You can also find full kombucha kits online that make getting prepared for your first brew a cinch!
Here is everything you’ll need to get started:
Large Glass Jar – Any wide-mouth glass or lead-free porcelain jar will do the trick. The recipe we outline below uses a 1-gallon jar, but you can easily make smaller batches using 1-liter or ½-gallon jars. Just make sure the container you choose has a large opening–at least 5 inches–to allow for adequate airflow and room for your hand so you can easily remove your SCOBY when needed. These jars are perfect for beginner kombucha brewers.
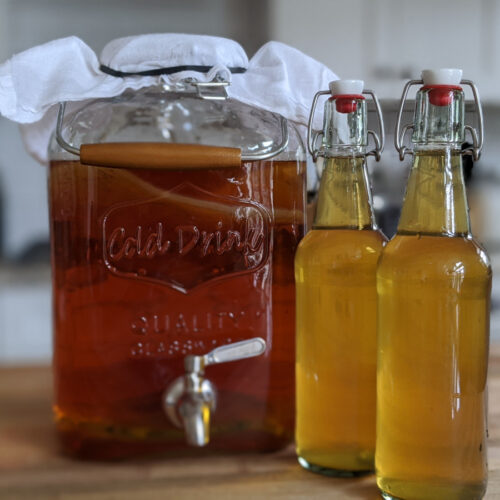
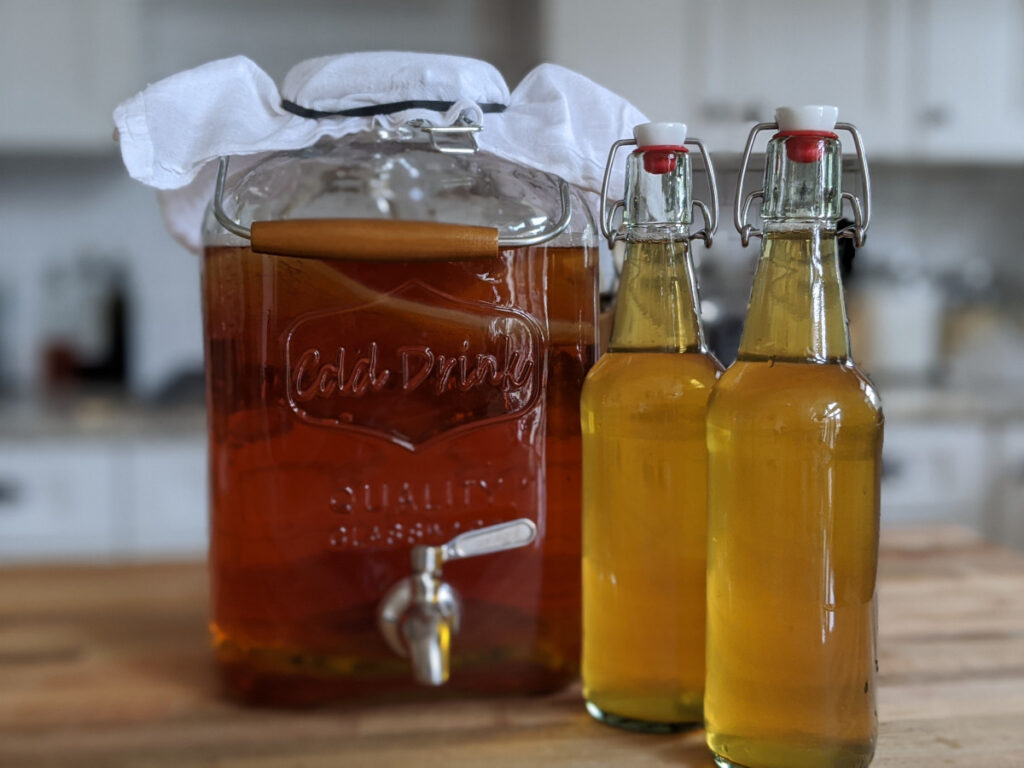
If you decide you like making homemade kombucha and you’re drinking a bottle every day, you’ll quickly realize a gallon doesn’t go far. My go-to glass jar is this 2-gallon drink dispenser. I picked it up at Walmart for $12, which I thought was a great deal.
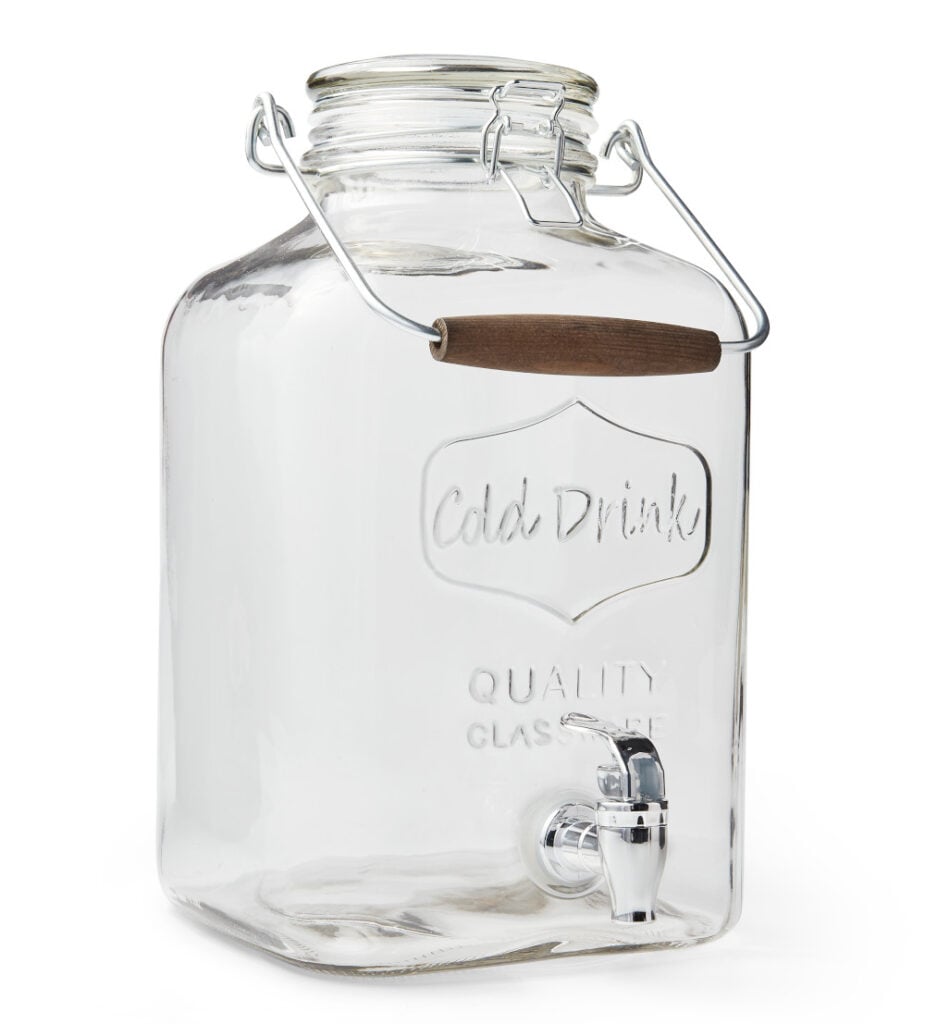
The only thing I didn’t like about it was the plastic spigot, so I ordered this stainless steel replacement spigot, which works beautifully.
Sugar – This is what the yeast in your SCOBY will eat during the fermentation process. The good bacteria in the brew will break the byproducts of this fermentation down further into healthy vitamins, acids, and enzymes. Simple, granulated sugar is what you’ll want. I recommend using organic if possible. You’ll need 1 cup of sugar for each gallon of kombucha you make.
Tea – Tea provides your SCOBY with all the nutrients it needs to get the fermentation job done. It’s a necessary ingredient for all types of kombucha. Caffeinated black tea is the easiest to use and the recommended type for new brewers. Once you get the hang of it and your SCOBY is big and strong, you can experiment with green and herbal tea blends. You will need 8 tea bags for each gallon of kombucha.
Since I brew a lot of kombucha, I like to buy 1-pound bags of loose leaf tea. This loose-leaf black tea tastes great and is an excellent value.
Filtered Water – You can use bottled water from the store or water filtered out of the tap at home. Just avoid using unfiltered tap water as it tends to contain chlorine and other contaminants that might affect the quality of your brew. Each gallon of kombucha uses about 12 cups of water.
My home uses well water that tends to be somewhat alkaline (high pH). For that reason, I add 1-2 tablespoons of distilled white vinegar per gallon of water to bring down the pH and help ensure I don’t get any mold growth while the fermentation ramps up.
Starter Kombucha – For your first batch of kombucha, you’ll need some “starter” to help kickstart the process and to keep your young tea acidic enough to prevent mold and bad bacteria growth. You can use any commercial kombucha so long as it is unpasteurized and has a neutral flavor (GT’s Original is a popular choice). You will need 2 cups for each gallon of kombucha.
Airtight Bottles – Once your kombucha is fermented, you’ll need to transfer the brew to airtight bottles for a second fermentation. This is what creates the carbonation found in most kombucha products. You can use mason jars for this purpose but they won’t be completely airtight and your final product may be a touch flatter than you want. The best option is to get true airtight bottling-type glass bottles. Any size will work, just make sure you have enough to fit your entire brew into.
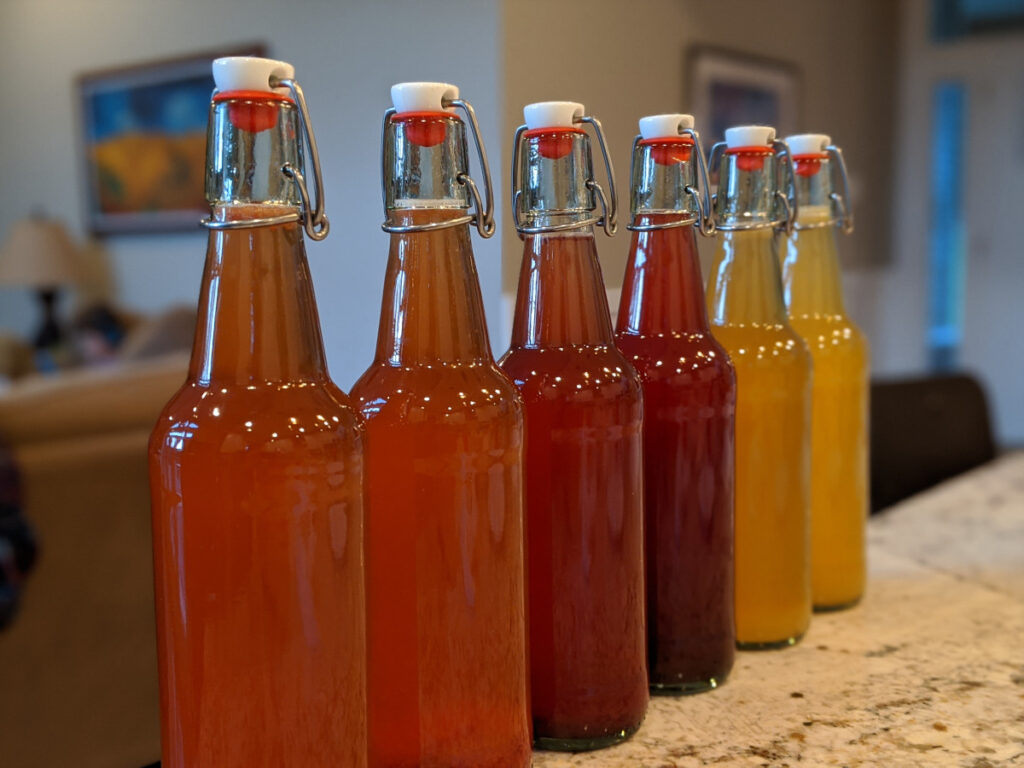
I use these swing top bottles with ceramic tops and they’re perfect. The set of 6 bottles is just about right for a 1-gallon batch (get two sets if you do two gallons at a time).
Jar Cover and Rubber Bands – You’ll need a breathable cover for the top of your brew jar. Tightly woven fabrics, layered cheesecloth, paper towels, or coffee filters all work fine. Secure them to the top of the jar with a rubber band.
Optional Equipment & Supplies
In addition to these necessary items, there are a few optional items you may want to pick up.
Tea Infuser – although you can get by just fine using tea bags, if you decide to use loose leaf tea, you’ll need a tea infuser. I use this one and it works perfectly.
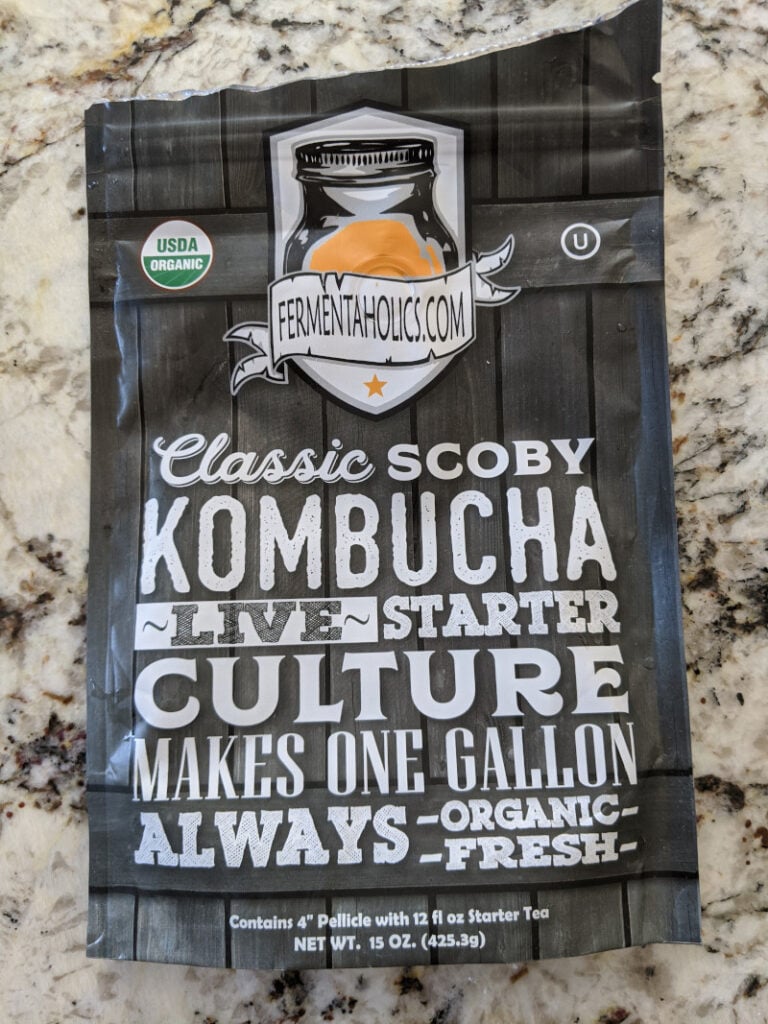
Live Starter Culture – In the recipe below, I’ll outline how to grow your own SCOBY from scratch. But, if you want to skip this 1 to 4-week process, you can purchase a live starter culture from any online kombucha homebrew site, or ask around locally to see if a friend or neighbor can spot you some SCOBY (you never know!). I’ve used this one from Fermantaholics with good results. It contains about 12 oz. of starter culture and a 4″ pellicle (enough for a gallon of finished kombucha).
Flavorings – During the second fermentation, you can use any number of flavorings to enhance the taste of your final product. Some good options for beginners include mashed or cut fruit, fresh or candied ginger, or citrus. It’s a good idea to have some raisins on hand, as a single raisin can often be enough to carbonate your ‘buch in secondary fermentation.
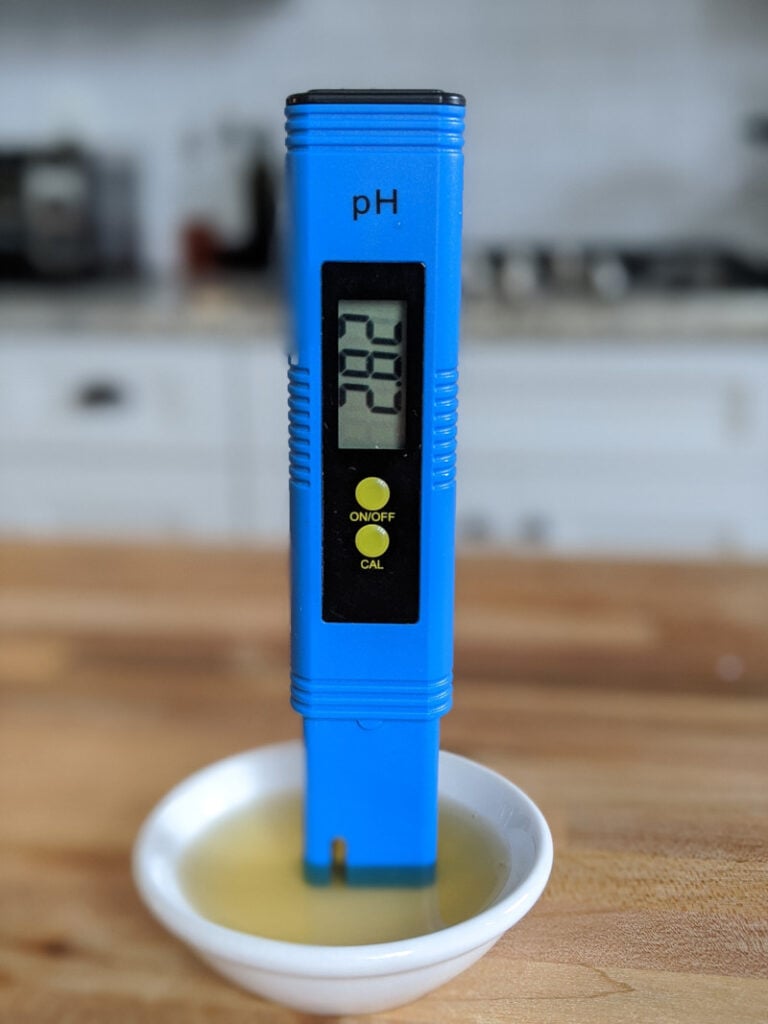
pH Tester – You can generally judge the acidity of a brew based on taste, but having a pH tester will take the guesswork out of the process. Novice brewers will also benefit from being able to quickly judge whether their starter tea is acidic enough to fend off mold growth. You can use a digital tester or paper test strips. I use this inexpensive digital pH meter, to tell you truth I think the test strips are better because they’re simpler and don’t need to be calibrated.
Temperature Strips – You’ll want to keep your brew around 75 degrees for the best results. If keeping your jar in a temperature-controlled room is an issue, a thermometer strip that attaches to the outside of the jar will help you determine your average brewing temp. These stick-on thermometer strips work well.
Distilled White Vinegar – This may be necessary to acidify your starting brew if your starter kombucha is too basic or is too diluted. Never use raw vinegar for this purpose.
How to Make Kombucha
Once you get the hang of it, making your own Kombucha is a simple process that will provide you with endless bottles of this delicious, probiotic-heavy beverage.
Below is a basic kombucha recipe that even a complete beginner can brew successfully on the first attempt.
PART 1: How to Make Your Own SCOBY
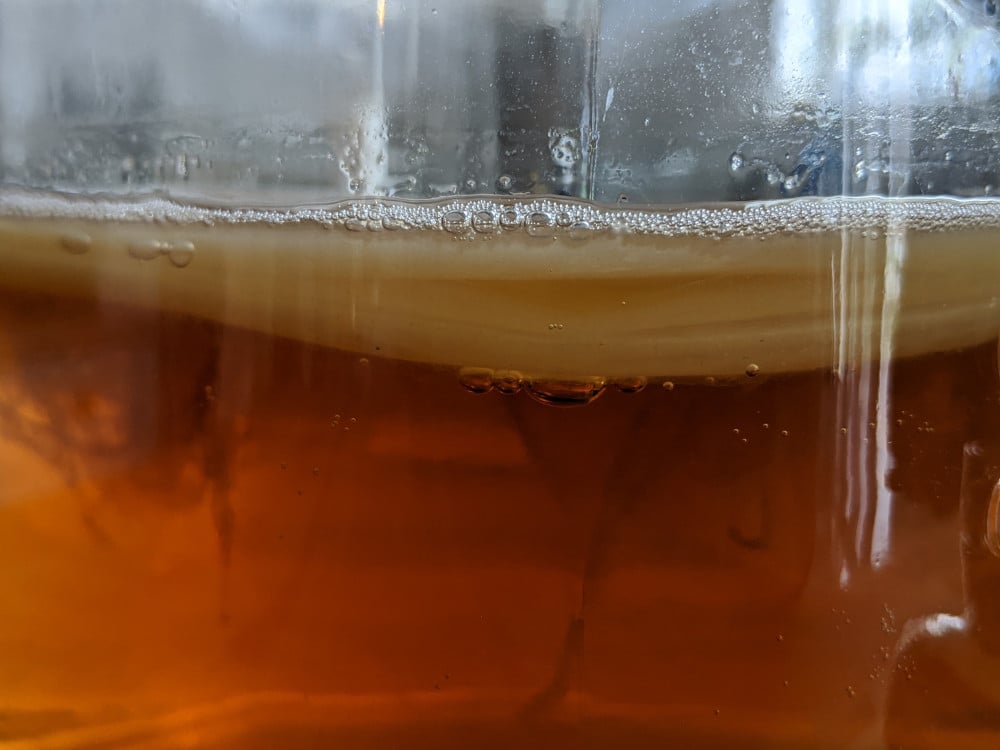
If you’re new to brewing kombucha, the very first thing you’ll need to do is create a SCOBY. This symbiotic culture of bacteria and yeast, or SCOBY, is responsible for turning your sugary tea into an acidic, nutritious beverage.
You can skip to part 2 if you already have a SCOBY from a friend or have ordered a starter culture online.
NOTE: Make sure all your tools and your hands are clean before starting. Avoid touching the brew with your hands.
- Start by boiling 2 cups of filtered water in a large pot.
- Remove the water from heat once it boils and add 4 bags of unflavored caffeinated black tea (or about 1 tablespoon loose-leaf in a tea diffuser). Allow to steep for about 5-10 minutes.
- Add a 1/2 cup granulated sugar and stir until it is completely dissolved.
- Add 5 cups of cool filtered water.
- Pour your sweet tea mixture into your clean brew jar and add 1 cup of starter kombucha. You can use any commercially available, unflavored, unpasteurized (raw) kombucha. GT’s Original is probably the best known and most readily available.
- Cover the jar with a cloth or coffee filter and secure it with a rubber band. Place it in a dark cupboard or closet that stays warm throughout the day and night (between 70 and 85 degrees).
- Check your jar every few days after the first week. You should notice bubbles rising and eventually a thin film forming on the top of the brew (that’s the cellulose mat, or pellicle).
- It will take between 1 and 4 weeks for your SCOBY to form. Once the pellicle has thickened into an opaque layer about ¼ inch thick, you are ready to move on to Part 2!
PART 2: The First Fermentation (1F)
Once you have a live SCOBY, you’re ready to begin your first batch of kombucha.
The first fermentation takes simple sweet tea and turns it into acidic, probiotic-rich kombucha tea. The second fermentation, which will follow, is when kombucha gets its tasty flavor and fizzy carbonation.
This recipe outlines how to make one gallon of kombucha. If you’re using a smaller or larger jar, refer to the helpful Kombucha Recipe Chart below to see how much of each ingredient to use for different sized batches.
IMPORTANT: Make sure your hands and tools are clean before beginning.
If you made your own SCOBY, reserve 2 cups of that brew to use as your starter and throw the rest out.
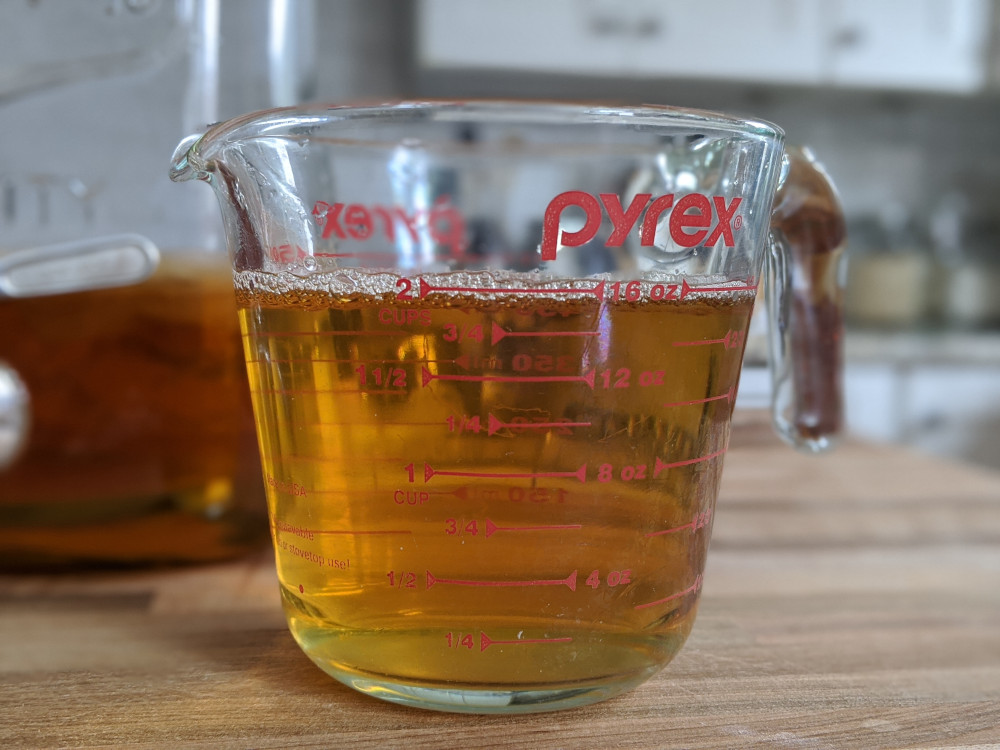
As you get ready to reuse your jar for your first real brew, remove the SCOBY and place it on a clean plate. You can rinse the jar before pouring in the new tea if you prefer.
- Boil 2 cups of filtered water in a large pot.
- Remove the water from heat add 8 bags of unflavored black tea (or about 2 tablespoons loose leaf) and allow the tea to steep for about 5-10 minutes.
- Add 1 cup granulated sugar and stir until it is completely dissolved.
- Pour the sweet tea mixture into your clean brew jar and top off with cool filtered water, leaving enough room to add your starter tea and SCOBY (about 3-4 inches from the top).
- Gently pour 2 cups of starter kombucha, into the brew jar and take a pH reading. To prevent mold growth, your starter brew needs to have a pH of around 4.5 or lower. If your pH is higher, slowly add small amounts of distilled white vinegar, stir, and retest until it reaches the desired level.
- With VERY clean hands, place your SCOBY into the jar.
- Cover the jar with your cloth or paper towels and secure it with a rubber band. Place it in a dark cupboard or closet that stays warm throughout the day and night (between 75 and 85 degrees).
- Allow your brew to ferment for between 7 to 21 days. Start tasting (by using a clean baster or pinching the end of a straw) after day 6 (if you’re using a drink dispenser like mine, you can just use the spigot). Once your brew reaches your preferred balance of acidic and sweet, you can move to Part 3. You can also use your pH tester to check the acidity. Kombucha will be between 2.5 and 3.5 pH when done brewing.
PART 3: The Second Fermentation (2F)
The last part of the kombucha brew process is to add carbonation as well as extra flavorings if you’d like.
To get a bubbly final product, transfer your brew (without the SCOBY) to airtight bottles and allow for further fermentation with additional flavorings, before stopping the fermentation process by placing the bottles in the fridge.
NOTE: As always, make sure your tools and hands are clean before beginning. Because it is impossible to tell when a glass bottle becomes too pressurized before it’s too late, we recommend utilizing a plastic test bottle until you feel comfortable with the second fermentation process. Simply replace one of your airtight glass bottles with a plastic one of a similar size. Once this bottle becomes rock hard, your brew is ready to be put in the fridge. Discard the tea in this plastic bottle but enjoy the rest!
- Pour your freshly brewed kombucha into your airtight bottles. You can filter the tea if you prefer but it is not necessary. Save 2 cups of tea and your SCOBY in your brew jar to act as the starter for your next brew.
- Add your flavorings (see ideas below) and extra sweeteners if you would like.
- Seal each bottle and allow them to further ferment in a dark room or cupboard for 3 to 10 days. Using your plastic tester bottle mentioned in the notes above will help you determine the optimal brew time for your specific environment.
- Once the desired carbonation is reached, strain out the added flavoring (if desired), reseal the bottles and place them in the fridge. Or just place them directly in the fridge and strain out the flavoring stuff. Or just leave the flavoring stuff in there and don’t worry about it. At this point, you’ve made delicious homemade kombucha, so how you drink it is up to you. It should last 1 to 3 months once refrigerated.
Troubleshooting Common Problems
No matter how perfect your method, you may still run into some issues during the brewing process. Here are some of the more common problems people run into and how to avoid or reverse them.
My SCOBY isn’t floating on the top
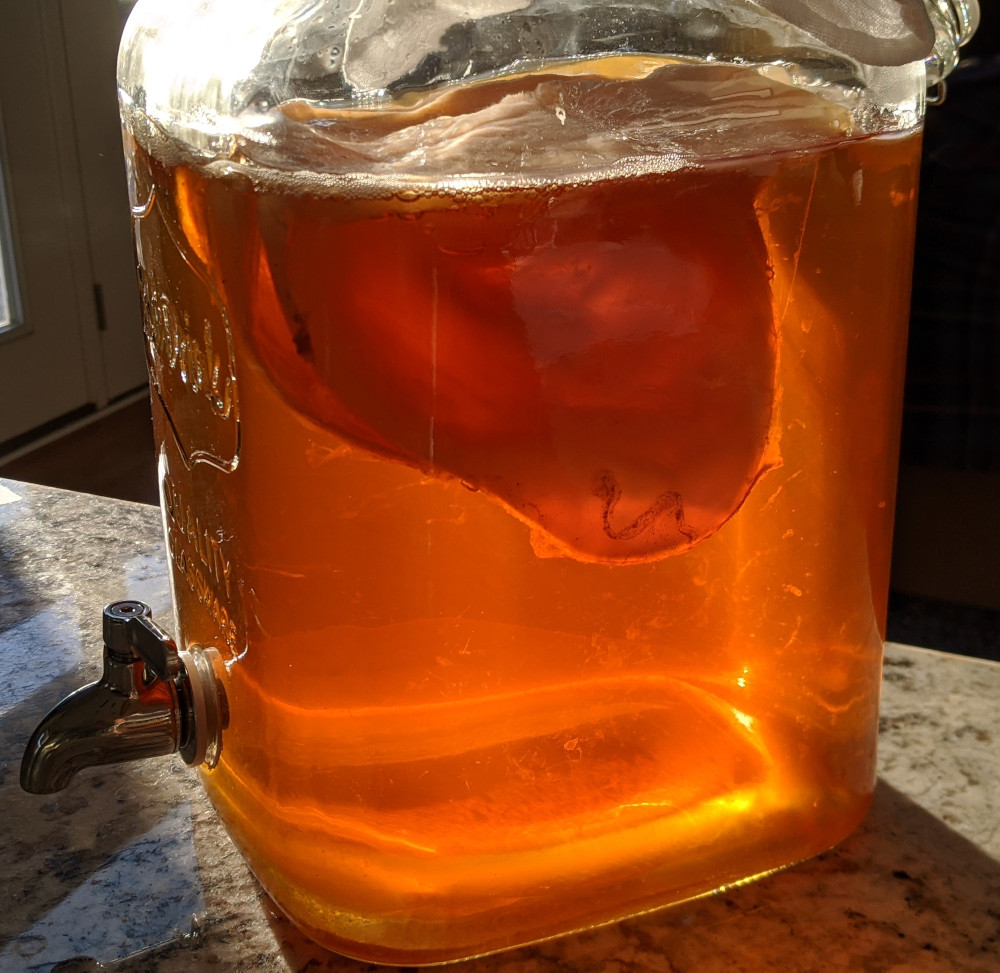
Most of the time your SCOBY will float on the top of the brew, but it’s perfectly fine if it floats sideways or hangs out near the bottom. It is also normal to see thin brown strands hanging off of it.
My SCOBY looks strange
While even the healthiest of SCOBYs will still look strange, there are some oddities that you should not ignore.
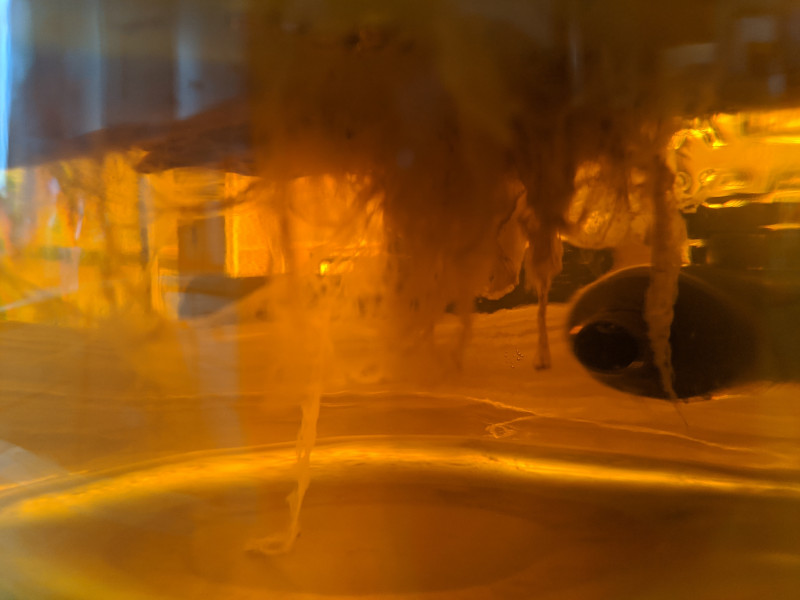
Fuzzy green or black areas are a sure sign of mold. These are usually accompanied by a cheesy or rotten odor. If you think your SCOBY has developed mold, throw it out, sanitize all instruments, and start a new SCOBY from scratch. The #1 reason for developing mold is too low of a temperature. Cold temps inhibit the fermentation process and keep your brew in a vulnerable state for too long. Remember: cold equals mold!
However, it’s completely normal for your SCOBY to develop hard brown patches, jelly-like patches, holes, and lumps. Usually, those are just yeast and nothing to worry about. As long as the brew smells normal, you are likely fine. But, if in doubt, toss the brew and start a fresh batch with the same SCOBY. If there is actually a problem, it will be very obvious after two or three brews.
My kombucha isn’t fizzy
For the most part, brewing kombucha is easy and you’re not likely to run into any problems. But if there’s one aspect that can be challenging for new brewers, it’s getting that fizzy, carbonated character in your kombucha. Here are the top reasons your kombucha isn’t fizzy:
- Your second fermentation wasn’t long enough. Sometimes 2F will only take a couple of days, but sometimes it can take 10-14 days. If you use the plastic bottle technique described above, a hard plastic bottle will tell you it’s ready to refrigerate and consume.
- Your bottles aren’t airtight. If after 10 days your tea still isn’t pressurized, it is likely that your bottles are not airtight and air has been escaping. While a brew fermented in leaky bottles may not be as fizzy, it is still drinkable. Stick it in the fridge and enjoy!
- Your temperature is too low. Brewing kombucha in the winter can take more time due to lower temperatures, and that’s especially evident when trying to achieve a fizzy 2F. Try moving the bottles to a warmer spot and give them a few more days to fizz.
- Your kombucha tea isn’t sweet enough. Usually, there’s enough residual sugar left from 1F to get carbonation in 2F. But sometimes if you let the brew go for a long time and the yeast has eaten most of the sugar, adding an extra teaspoon of sugar (or even a raisin) into the bottles for 2F will provide enough sugar to get fizzy. Stirring your brew before bottling pulls some of the yeast up from the bottom so it makes it into your bottles to eat the sugar and produce CO2 (carbonation).
- Your starter is too “young.” If it’s your first batch, that could be the problem. As you continue to brew, your starter will get stronger and produce better results.
- You’re leaving too much headspace. If you’re using the swing top bottles I mention above, I suggest filling them up to the notch in the neck, where the wire bail goes in. Leave a little headspace, however, to ensure the contents of your bottles don’t end up on the ceiling.
My kombucha is taking too long to brew
If your brew is taking an especially long time to complete, it likely means the room is too cool. As long as your SCOBY looks healthy, try moving it to a warmer area.
Too little or too much sugar can also cause fermentation to slow. If there is a good chance your ratios were off to begin with, dump the batch and start the fermentation process again.
Fermentation might also slow down if there isn’t enough oxygen available. Make sure you haven’t suffocated your brew with too thick of a cover or too small of an opening at the top of the jar.
It is actually possible to brew your next batch without using the SCOBY at all. All you really need are the two cups of tea from your previous batch. But, using your SCOBY in addition to the two cups of tea is said to decrease how long it takes your next batch to brew.
My SCOBY is getting too big
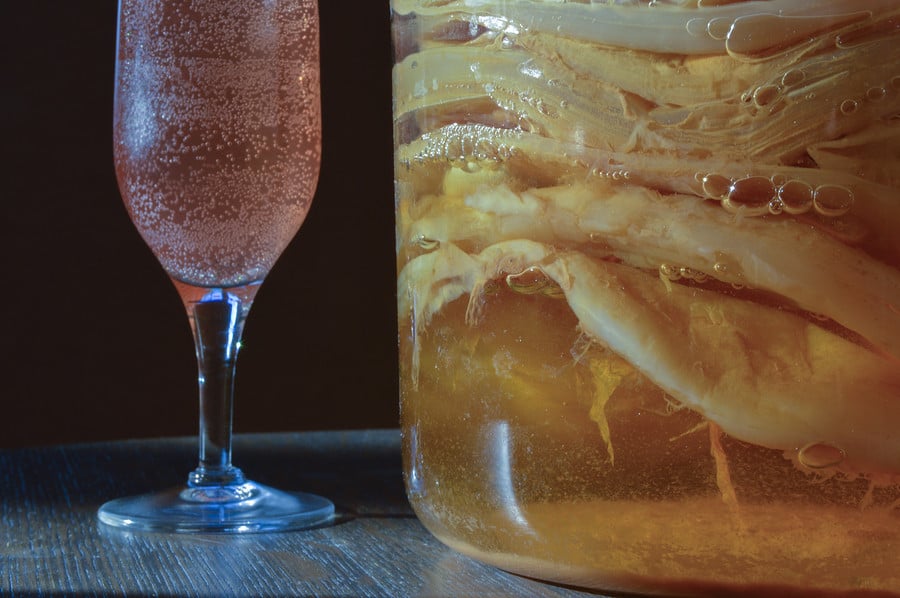
To keep your SCOBY in check, it is best to peel off the thick bottom layer after each brew and discard it (or, better yet, toss it in the compost!). Some people keep “SCOBY hotels,” which are separate jars dedicated to housing multiple generations of SCOBYs.
Best Kombucha Flavors
Here are some popular kombucha flavoring ideas to try out. This is the fun part, so use your creativity!
- Ginger
- Lemon Ginger
- Root Beer
- Apple-Cinnamon
- Beet Juice
- Cherry
- Elderberry
- Cola
- Ginger-Turmeric
- Hibiscus-Rose
- Hopped Grapefruit
- Lemonade
- Raspberry Lemonade
- Peach
- Mojito
- Blueberry
- Pineapple
- Mango
Time to Enjoy!
Once you’ve finished brewing your first batch, take a moment to enjoy the fruits of your labor. But don’t forget to keep 2 cups of your brew with your SCOBY in it so you can start your next batch as soon as you have time.
Whether you become a back-to-back brewer, a continuous brewer, or take a few weeks off in between each batch, we’re confident about one thing: store-bought ‘buch will never taste as good again.
Basic Kombucha Recipe Chart
The chart below provides the correct ratios for scaling up or down the basic kombucha recipe. The amount of water indicated is the maximum you’ll want to use.
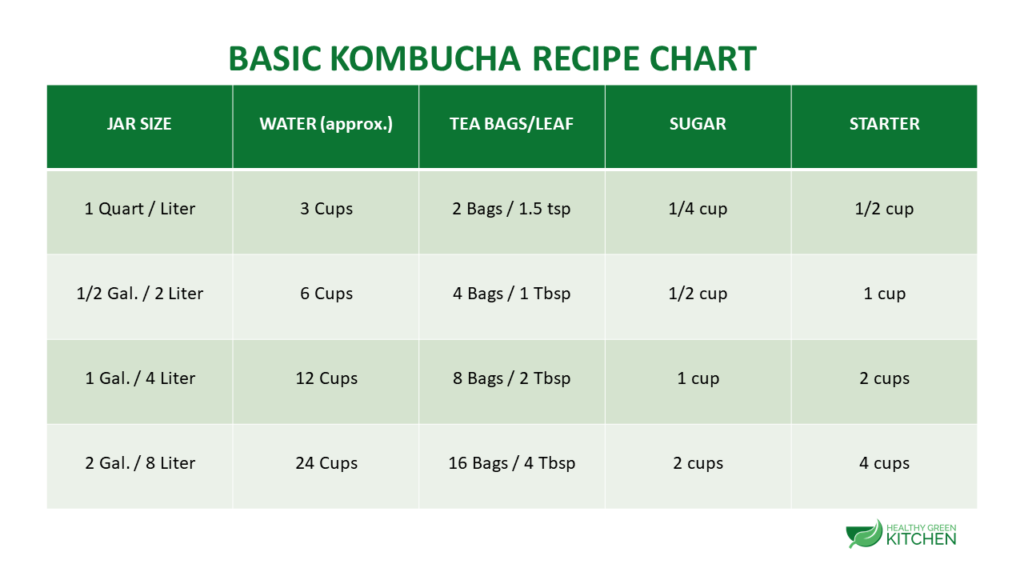
In reality, the jar or container you’re using may not fit the full amount of water indicated. It’s important to leave some headspace at the top to provide plenty of oxygen and room for your SCOBY to form, so the amount of water you actually use may be a little less than what’s indicated in the Water column below.
How to Make Kombucha
Equipment
- breathable cover (eg. coffee filter or fabric) and a rubber band
- tea infuser
- pH tester
- temperature strips
Ingredients
SCOBY Ingredients
- 7 cups water filtered, non-chlorinated
- 4 bags black tea or 1 tbsp loose leaf tea
- 1/2 cup sugar plain white granulated
- 1 cup plain kombucha eg. GT's Original
Kombucha Ingredients (1st Fermentation)
- 14 cups water filtered, non-chlorinated
- 8 bags black tea or 2 tsp loose leaf tea
- 2 cups starter kombucha with SCOBY
Kombucha Ingredients (2nd Fermentation)
- homemade kombucha from 1st fermentation
- desired flavorings and/or sweetener
Instructions
How to Make a SCOBY
- Boil 2 cups of filtered, non-chlorinated water in a large pot.
- Remove the water from heat and add 4 bags of unflavored caffeinated black tea (or about 1 tablespoon loose leaf). Allow to steep for about 5-10 minutes.
- Add a 1/2 cup granulated sugar and stir until it is completely dissolved.
- Add 5 cups of cool filtered water.
- Pour your sweet tea mixture into your clean brew jar and add 1 cup of starter kombucha using any unflavored, unpasteurized (raw) kombucha.
- Cover the jar with your cloth or paper towels and place it in a dark cupboard or closet that stays warm throughout the day and night (between 70 and 85 degrees).
- Check your jar every few days after the first week. You should notice bubbles rising and eventually a thin film forming on the top of the brew.
- It will take between 1 and 4 weeks for your SCOBY to form. Once the pellicle has thickened into an opaque layer about ¼ inch thick, you are ready to make your first full batch of kombucha tea.
How to Make Kombucha Tea
- Boil 2 cups of filtered water in a large pot.
- Remove the water from heat add 8 bags of unflavored black tea (or about 2 tablespoons loose leaf) and allow the tea to steep for about 5-10 minutes.
- Add 1 cup granulated sugar and stir until it is completely dissolved.
- Pour the mixture into a clean brew jar and top off with cool filtered water, leaving enough room to add your starter tea and SCOBY (about 3-4 inches from the top).
- Gently pour 2 cups of starter kombucha, into the brew jar and take a pH reading. To prevent mold growth, your starter brew needs to have a pH of around 4.5 or lower. If your pH is higher, slowly add small amounts of distilled white vinegar, stir, and retest until it reaches the desired level.
- With VERY clean hands, place your SCOBY into the jar.
- Cover the jar with your cloth or paper towels and secure with a rubber band. Place it in a dark cupboard or closet that stays warm throughout the day and night (between 75 and 85 degrees).
- Allow to ferment for 7 to 21 days. Start tasting after day 6. Once your brew reaches your preferred balance of acidic and sweet, you can add flavorings (if desired) and bottle. Finished Kombucha will be between 2.5 and 3.5 pH when done brewing.
How to Bottle & Carbonate Kombucha
- Pour freshly brewed kombucha into airtight bottles. You can filter the tea if you prefer but it is not necessary. Save 2 cups of tea and your SCOBY in your brew jar to act as the starter for your next brew.
- Add your flavorings and extra sweeteners, if desired.
- Seal each bottle and allow them to further ferment in a dark room or cupboard for 3 to 10 days (sometimes longer in cooler temperatures).
- Once the desired carbonation is reached, you can refrigerate, strain out the added flavorings (if desired), and serve.
Notes
- Each 1-cup serving of kombucha has approximately 47.5mg of caffeine
- A by-product of fermentation is alcohol, so kombucha can have small amounts of alcohol in the final product. If this is a concern, you may want to avoid drinking kombucha or consult your physician.

